3. Development Workflow
Anyone wishing to make contributions to OpenMC should be fully acquianted and comfortable working with git and GitHub. We assume here that you have git installed on your system, have a GitHub account, and have setup SSH keys to be able to create/push to repositories on GitHub.
3.1. Overview
Development of OpenMC relies heavily on branching; specifically, we use a branching model sometimes referred to as git flow. If you plan to contribute to OpenMC development, we highly recommend that you read the linked blog post to get a sense of how the branching model works. There are two main branches that always exist: master and develop. The master branch is a stable branch that contains the latest release of the code. The develop branch is where any ongoing development takes place prior to a release and is not guaranteed to be stable. When the development team decides that a release should occur, the develop branch is merged into master.
Trivial changes to the code may be committed directly to the develop branch by a trusted developer. However, most new features should be developed on a branch that branches off of develop. When the feature is completed, a pull request is initiated on GitHub that is then reviewed by a trusted developer. If the pull request is satisfactory, it is then merged into develop. Note that a trusted developer may not review their own pull request (i.e., an independent code review is required).
3.2. Code Review Criteria
In order to be considered suitable for inclusion in the develop branch, the following criteria must be satisfied for all proposed changes:
- Changes have a clear purpose and are useful.
- Compiles under all conditions (MPI, OpenMP, HDF5, etc.). This is checked as part of the test suite.
- Passes the regression suite.
- If appropriate, test cases are added to regression suite.
- No memory leaks (checked with valgrind).
- Conforms to the OpenMC style guide.
- No degradation of performance or greatly increased memory usage. This is not a hard rule – in certain circumstances, a performance loss might be acceptable if there are compelling reasons.
- New features/input are documented.
- No unnecessary external software dependencies are introduced.
3.3. Contributing
Now that you understand the basic development workflow, let’s discuss how an individual to contribute to development. Note that this would apply to both new features and bug fixes. The general steps for contributing are as follows:
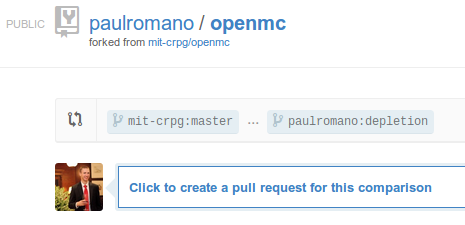
Fork the main openmc repository from mit-crpg/openmc. This will create a repository with the same name under your personal account. As such, you can commit to it as you please without disrupting other developers.

Clone your fork of OpenMC and create a branch that branches off of develop:
git clone git@github.com:yourusername/openmc.git
cd openmc
git checkout -b newbranch develop
Make your changes on the new branch that you intend to have included in develop. If you have made other changes that should not be merged back, ensure that those changes are made on a different branch.
Issue a pull request from GitHub and select the develop branch of mit-crpg/openmc as the target.
At a minimum, you should describe what the changes you’ve made are and why you are making them. If the changes are related to an oustanding issue, make sure it is cross-referenced. A wise developer would also check whether their changes do indeed pass the regression test suite.
A trusted developer will review your pull request based on the criteria above. Any issues with the pull request can be discussed directly on the pull request page itself.
After the pull request has been thoroughly vetted, it is merged back into the develop branch of mit-crpg/openmc.
3.4. OpenMC Test Suite
The purpose of this test suite is to ensure that OpenMC compiles using various combinations of compiler flags and options, and that all user input options can be used successfully without breaking the code. The test suite is comprised of regression tests where different types of input files are configured and the full OpenMC code is executed. Results from simulations are compared with expected results. The test suite is comprised of many build configurations (e.g. debug, mpi, hdf5) and the actual tests which reside in sub-directories in the tests directory. We recommend to developers to test their branches before submitting a formal pull request using gfortran and intel compilers if available.
The test suite is designed to integrate with cmake using ctest. It is configured to run with cross sections from NNDC. To download these cross sections please do the following:
cd ../data
python get_nndc_data.py
export CROSS_SECTIONS=<path_to_data_folder>/nndc/cross_sections.xml
The test suite can be run on an already existing build using:
cd build
make test
or
cd build
ctest
There are numerous ctest command line options that can be set to have more control over which tests are executed.
Before running the test suite python script, the following environmental variables should be set if the default paths are incorrect:
FC - The command of the Fortran compiler (e.g. gfotran, ifort).
- Default - gfortran
MPI_DIR - The path to the MPI directory.
- Default - /opt/mpich/3.1.3-gnu
HDF5_DIR - The path to the HDF5 directory.
- Default - /opt/hdf5/1.8.14-gnu
PHDF5_DIR - The path to the parallel HDF5 directory.
- Default - /opt/phdf5/1.8.14-gnu
To run the full test suite, the following command can be executed in the tests directory:
python run_tests.py
A subset of build configurations and/or tests can be run. To see how to use the script run:
python run_tests.py --help
As an example, say we want to run all tests with debug flags only on tests that have cone and plot in their name. Also, we would like to run this on 4 processors. We can run:
python run_tests.py -j 4 -C debug -R "cone|plot"
Note that standard regular expression syntax is used for selecting build configurations and tests. To print out a list of build configurations, we can run:
python run_tests.py -p
3.4.1. Adding tests to test suite
To add a new test to the test suite, create a sub-directory in the tests directory that conforms to the regular expression test_. To configure a test you need to add the following files to your new test directory, test_name for example:
- OpenMC input XML files
- test_name.py - python test driver script, please refer to other tests to see how to construct. Any output files that are generated during testing must be removed at the end of this script.
- results.py - python script that extracts results from statepoint output files. By default it should look for a binary file, but can take an argument to overwrite which statepoint file is processed, whether it is at a different batch or with an HDF5 extension. This script must output a results file that is named results_test.dat. It is recommended that any real numbers reported use 12.6E format.
- results_true.dat - ASCII file that contains the expected results from the test. The file results_test.dat is compared to this file during the execution of the python test driver script. When the above files have been created, generate a results_test.dat file and copy it to this name and commit. It should be noted that this file should be generated with basic compiler options during openmc configuration and build (e.g., no MPI/HDF5, no debug/optimization).
In addition to this description, please see the various types of tests that are already included in the test suite to see how to create them. If all is implemented correctly, the new test directory will automatically be added to the CTest framework.
3.5. Private Development
While the process above depends on the fork of the OpenMC repository being publicly available on GitHub, you may also wish to do development on a private repository for research or commercial purposes. The proper way to do this is to create a complete copy of the OpenMC repository (not a fork from GitHub). The private repository can then either be stored just locally or in conjunction with a private repository on Github (this requires a paid plan). Alternatively, Bitbucket offers private repositories for free. If you want to merge some changes you’ve made in your private repository back to mit-crpg/openmc repository, simply follow the steps above with an extra step of pulling a branch from your private repository into a public fork.